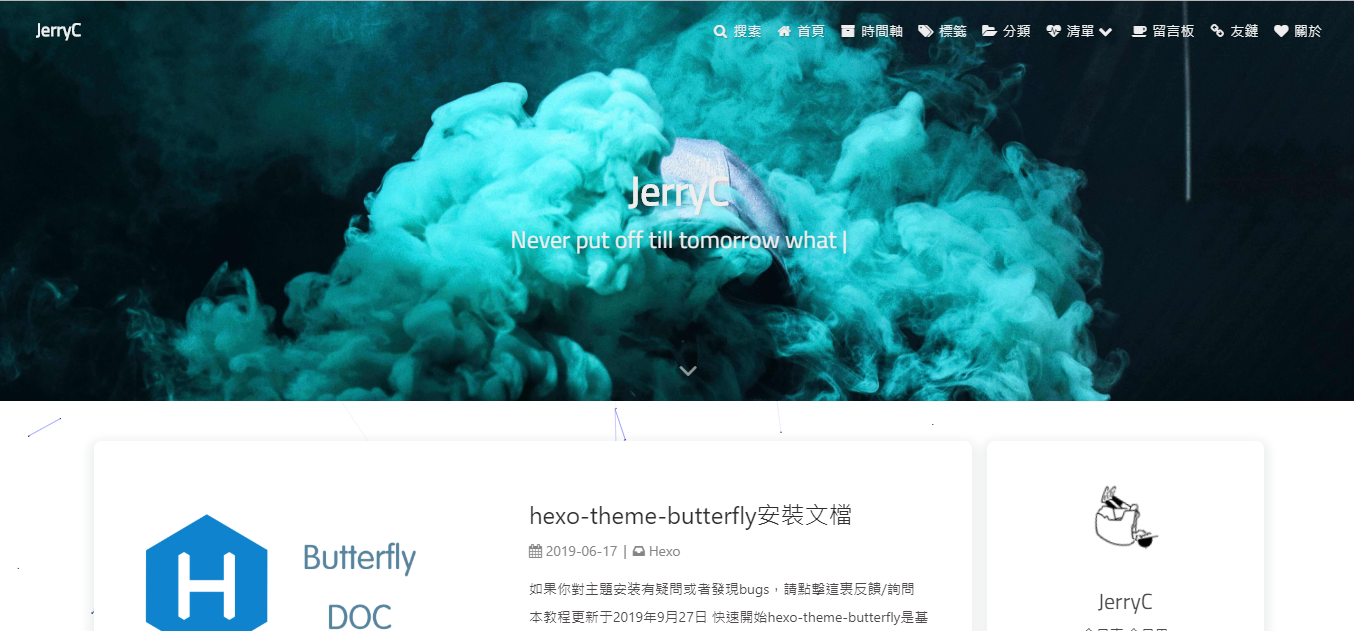
hexo-theme-butterfly安装文档
说明:
本文只转载了我需要的内容,作为本人记录。需要看全文的朋友请访问原文链接
原文作者: JerryC
原文链接: https://jerryc.me/posts/21cfbf15/
| 注:Butterfly已经升级到V2.0.0,从旧版本升级到V2.0.0,需重新配置butterfly.yml(_config.yml) |
快速开始
hexo-theme-butterfly是基于Molunerfinn的hexo-theme-melody的基础上进行开发的。
文档也是在hexo-theme-melody的文档基础上修改。因为一些配置变更导致与原主题配置上有部分区别。故如果安装hexo-theme-butterfly主题,请参考这篇文档。
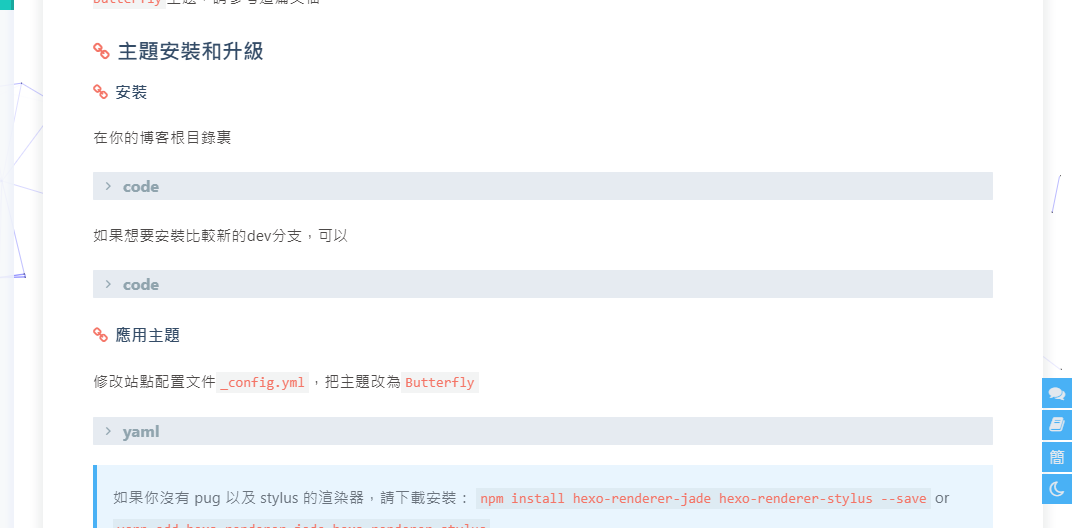
主题安装和升级
安装
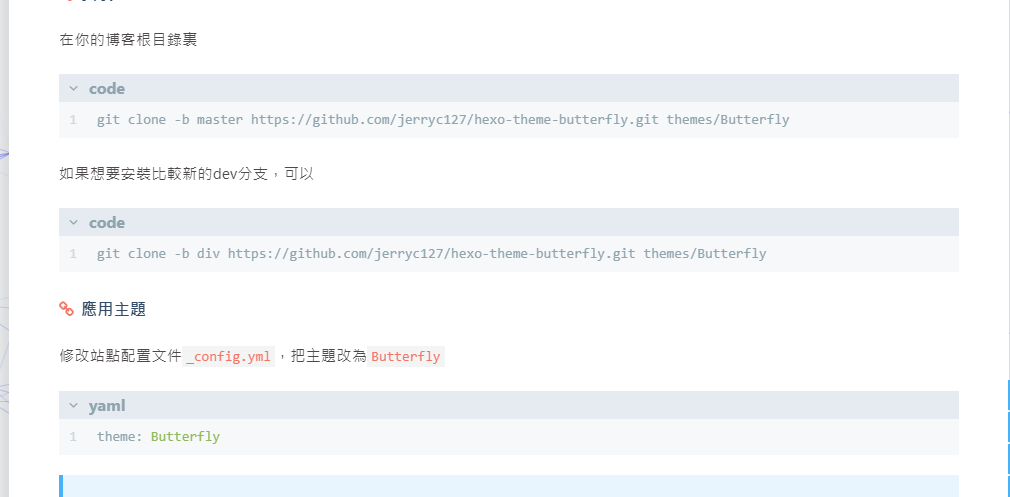
在你的博客根目录里
1 | git clone -b master https://github.com/jerryc127/hexo-theme-butterfly.git themes/Butterfly |
如果想要安装比较新的dev分支,可以
1 | git clone -b dev https://github.com/jerryc127/hexo-theme-butterfly.git themes/Butterfly |
应用主题
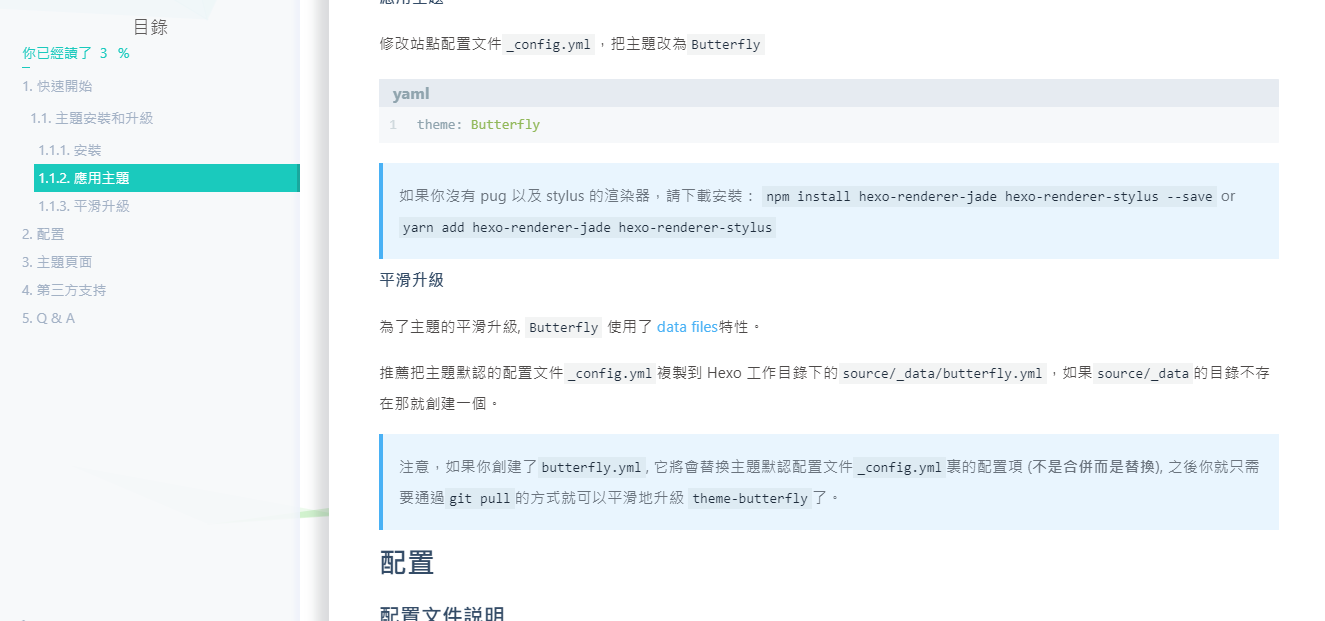
修改站点配置文件_config.yml,把主题改为Butterfly
1 | theme: Butterfly |
| 如果你没有 pug 以及 stylus 的渲染器,请下载安装: npm install hexo-renderer-pug hexo-renderer-stylus --save or yarn add hexo-renderer-pug hexo-renderer-stylus |
为了主题的平滑升级, Butterfly使用了data files特性。
推荐把主题默认的配置文件_config.yml复製到 Hexo 工作目录下的source/_data/butterfly.yml,如果source/data的目录不存在那就创建一个。
| 注意,如果你创建了 butterfly.yml 它将会替换主题默认配置文件 _config.yml里的配置项 (不是合併而是替换), 之后你就只需要通过git pull的方式平滑地升级theme-butterfly了。 |
Page Front-matter
1 | --- |
Post Front-matter
1 | --- |
标籤页
- 前往你的 Hexo 博客的根目录
- 输入 hexo new page tags
- 你会找到source/tags/index.md这个文件
- 修改这个文件:
1 | --- |
分类页
- 前往你的 Hexo 博客的根目录
- 输入 hexo new page categories
- 你会找到 source/categories/index.md这个文件
- 修改这个文件:
1 | --- |
友情链接
为你的博客创建一个友情链接!
创建友情链接页面
- 前往你的 Hexo 博客的根目录
- 输入 hexo new page link
- 你会找到 source/link/index.md这个文件
- 修改这个文件:
1 | --- |
友情链接添加
在Hexo博客目录中的 source/_data,创建一个文件 link.yml
1 | class: |
友情链接界面设置
需要添加友情链接,可以在Butterfly.yml配置
可在友情链接上写上自己的个人资料,方便其他人添加。
1 | Flink: |

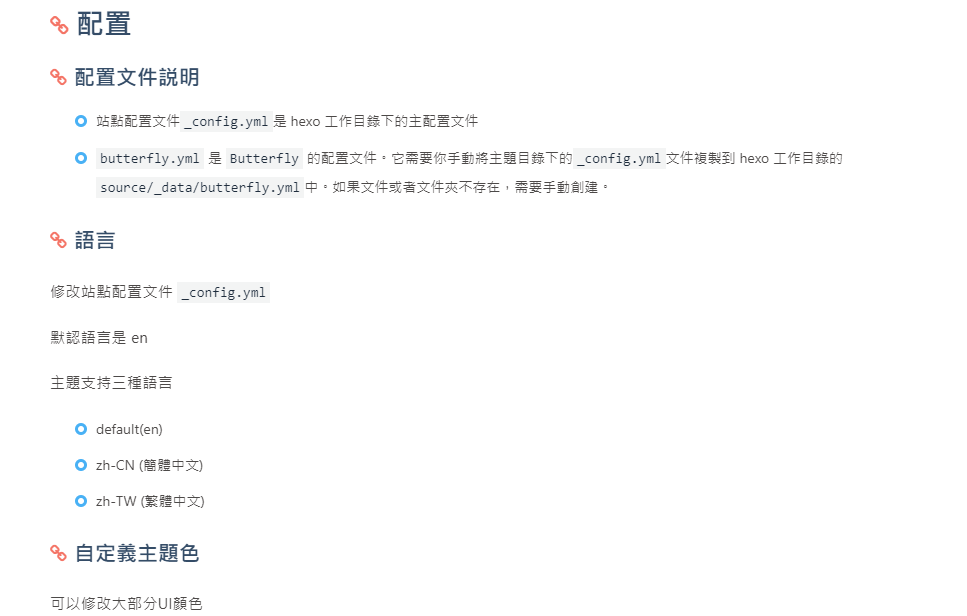
配置
配置文件説明
- 站点配置文件 _config.yml是 hexo 工作目录下的主配置文件(还不知道是哪里的,自己google)
- butterfly.yml 是 Butterfly 的配置文件。它需要你手动将主题目录下的_config.yml文件复製到 hexo 工作目录的 source/_data/butterfly.yml中。如果文件或者文件夹不存在,需要手动创建。
语言
修改站点配置文件 _config.yml
默认语言是 en
主题支持三种语言
- default(en)
- zh-CN (简体中文)
- zh-TW (繁体中文)
网站资料
修改网站各种资料,例如标题、副标题和邮箱等个人资料,请修改博客根目录的_config.yml
1 | title: 'Jerry Huang' |
导航菜单
配置 butterfly.yml
1 | menu: |
| 必须是/xxx/,后面||分开,然后写图标名。菜单名称可自己修改 格式: 显示名称: 路径||icon sub-menu格式 名称||icon 名称||路径||icon |

代码
代码高亮主题
Butterfly 支持了 Material Theme全部 5 种代码高亮样式:
- default
- darker
- pale night
- light
- ocean
配置butterfly.yml
1 | highlight_theme: light |
下面是5中高亮的样式:
| deault |
| darker |
| pale night |
| light |
| ocean |
代码复製
主题支持代码复製功能
配置butterfly.yml
1 | highlight_copy: true |
代码框展开/关闭
在默认情况下,代码框自动展开,可设置是否所有代码框都关闭状态,点击>可展开代码
1 | highlight_shrink: true #代码框不展开,需点击 '>' 打开 |
highlight_shrink: true
highlight_shrink: false
代码换行
在默认情况下,hexo-highlight在编译的时候不会实现代码自动换行。如果你不希望在代码块的区域里有横向滚动条的话,那么你可以考虑开启这个功能。
配置butterfly.yml
1 | code_word_wrap: true |
然后找到你站点的 Hexo 配置文件_config.yml,将line_number改成false:
1 | highlight: |
| 设置code_word_wrap之前: |
| 设置code_word_wrap之后: |
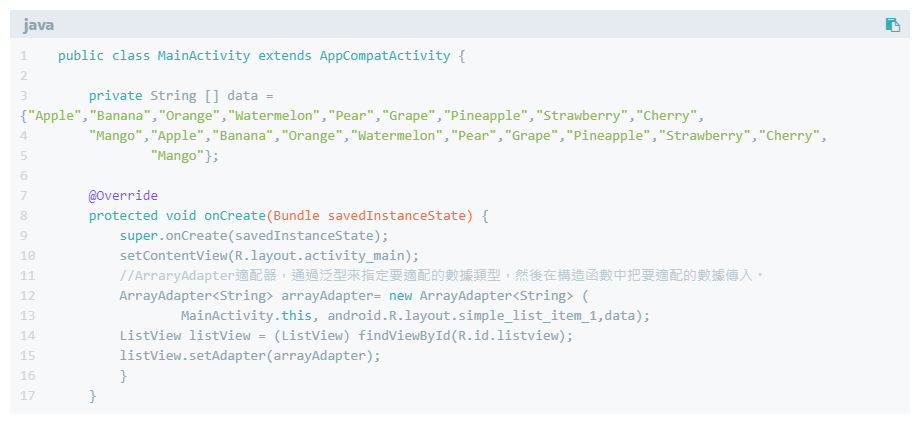
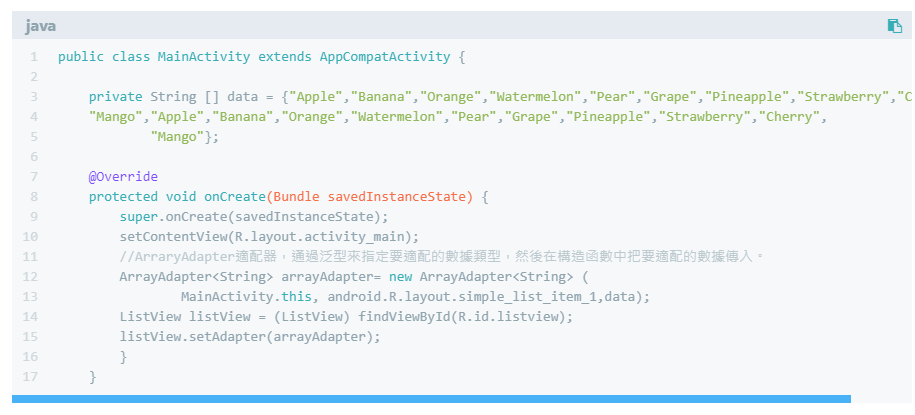
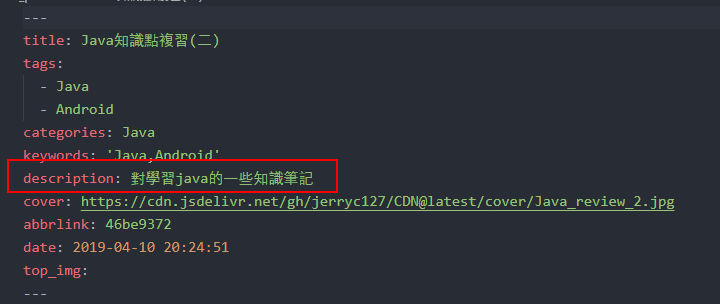
主页文章节选(自动节选和文章页description)
因为主题UI的关係,主页文章节选只支持自动节选和文章页description。优先选择自动节选。
在butterfly.yml里可以开启auto_excerpt的选项,你的文章将会在自动截取部分显示在主页。(默认显示150个字)。
1 | auto_excerpt: |
如果没有开启自动节选,则会显示文章页front-matter里面设置的description。
| 注意:如果开启了自动节选功能,代码块的显示将有可能不正常。 |
顶部图有2种配置:具体url 和(留空,true和false,三个效果一样)
page页
当具体url时
主页的顶部图可以在Butterfly.yml设置index_img
archives页的顶部图可以在Butterfly.yml设置archive_img
其他page页的顶部图可以在各自的md页面设置front-matter中的top_img
| 页面如果没有设置各自的top_img,则会显示default_top_img图片 |
主页会显示纯颜色的顶部图
其他page的顶部图没有设置时,也会显示纯颜色的顶部图
post页
post页的顶部图会优先显示各自front-matter中的top_img,如果没有设置,则会缩略图(即各自front-matter中的cover),如果没有则会显示显示default_top_img图片
文章相关项
这个选项是用来显示文章的相关信息的。
配置butterfly.yml
1 | post_meta: |
在文章顶部的资料,
date_type: 可设置文章日期显示创建日期(created)或者更新日期(updated)或者两种都显示(both)
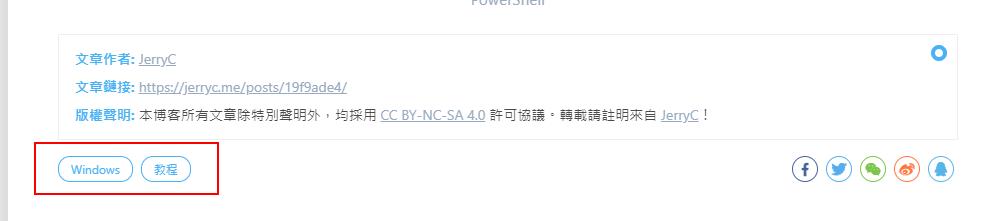
categories 是否显示分类
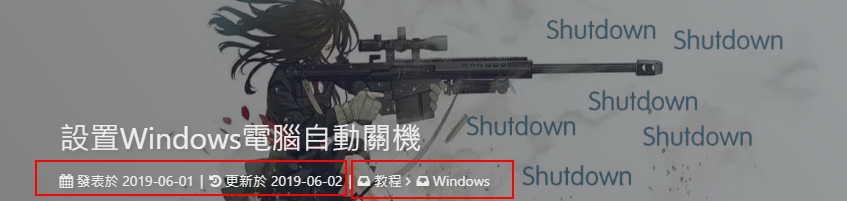
tags是否显示标籤
文章版权
为你的博客文章展示文章版权和许可协议。
配置butterfly.yml
1 | post_copyright: |
如果有文章(例如:转载文章)不需要显示版权,可以在文章Front-matter单独设置
1 | copyright: false |
版权显示截图

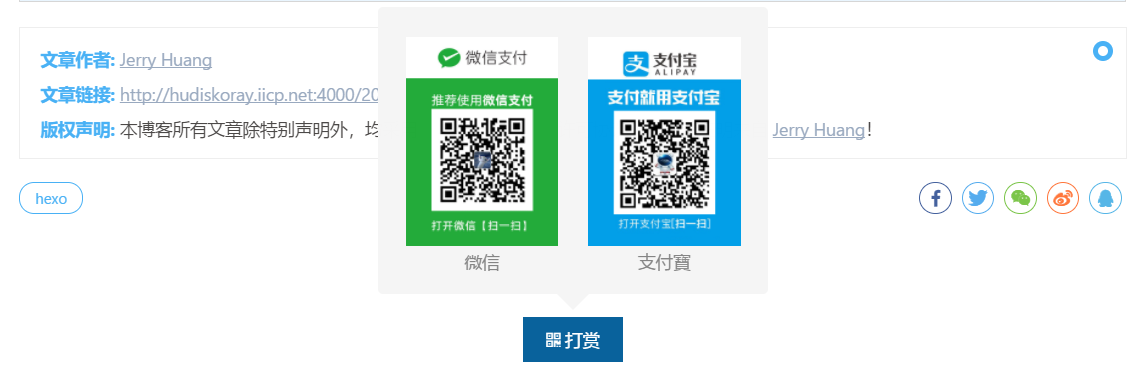
文章打赏
在你每篇文章的结尾,可以添加打赏按钮。相关二维码可以自行配置
配置butterfly.yml
1 | reward: |
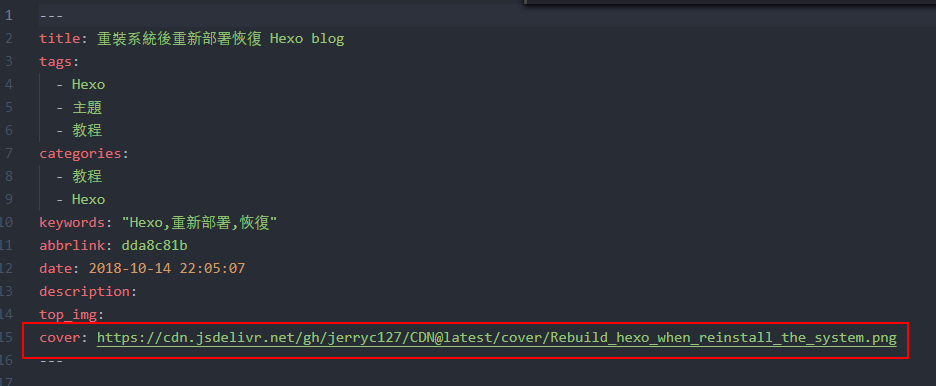
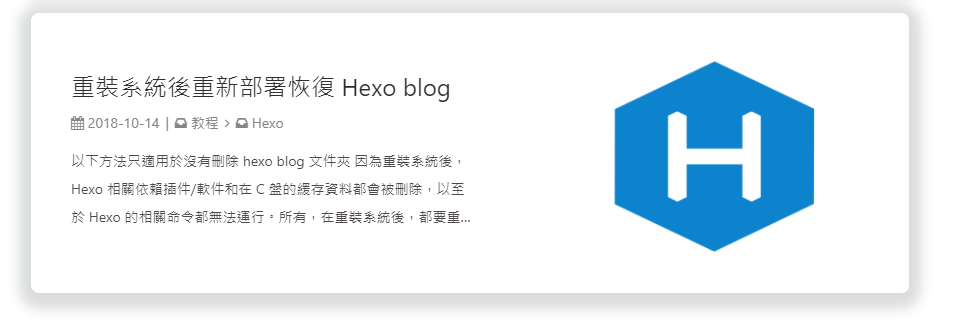
文章封面
文章的markdown文档上,在Front-matter添加cover,并填上要显示的图片地址。
如果不配置cover,可以设置显示默认的cover.
配置butterfly.yml
1 | default_cover: https://cdn.jsdelivr.net/gh/jerryc127/CDN@latest/cover/default_bg.png |
当配置多张图片时,会随机选择一张作爲cover.此时写法应爲
1 | default_cover: |
头像
配置butterfly.yml
1 | avatar: https://xxxx/avatar.png |
![]()
TOC
在文章页,会有一个目录,用于显示TOC。 手机端默认显示按钮。
配置butterfly.yml
1 | toc: |
PC
Mobile
为特定的文章配置是否显示TOC和特定的目录章节数字
在你的文章md文件的头部,加入toc_number和 toc项,并配置true或者false即可。
toc是否显示文章TOC
toc_number 是否显示章节数
配置之后你的特定的文章将会拥有它自己的目录数字的显示与否,而不会受全局的配置影响。
| enable: true |
| number: false |
设置是否自动打开TOC
可选择进入文章页面时,是否自动打开sidebar显示TOC
1 | auto_open_sidebar: |
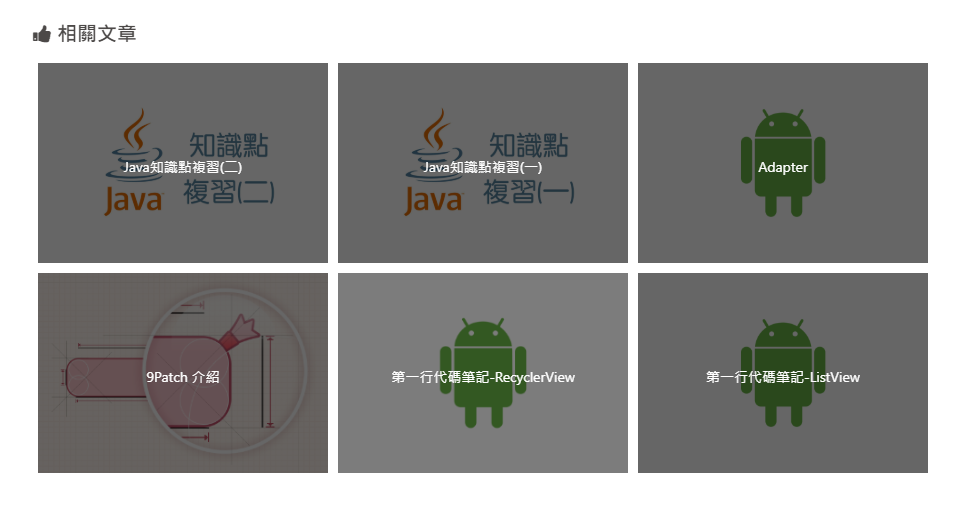
相关文章
相关文章推荐的原理是根据文章tags的比重来推荐
配置butterfly.yml
1 | related_post: |
Footer 设置
博客年份
since是一个来展示你站点起始时间的选项。它位于页面的最底部。
配置butterfly.yml
1 | since: 2018 |

页脚自定义文本
footer_custom_text是一个给你用来在页脚自定义文本的选项。通常你可以在这里写声明文本等。支持 HTML。
配置butterfly.yml
1 | footer_custom_text: Hi, welcome to my <a href="https://jerryc.me/">blog</a>! |

ICP
对于部分有备案的域名,可以在ICP配置显示。
配置butterfly.yml
1 | ICP: |
右下角按钮
简繁转换
简体繁体互换
右下角会有简繁转换按钮。
配置butterfly.yml
1 | translate: |
| 简体 |
| 繁体 |
夜间模式
右下角会有夜间模式按钮
配置butterfly.yml
1 | # 夜间模式 |
| V2.0.0 开始增加一个选项,可开啓自动切换light mode 和 dark mode autoChangeMode: 1 跟随系统而变化,不支持的浏览器/系统将按照时间晚上6点到早上6点之间切换为 dark mode autoChangeMode: 2 只按照时间 晚上6点到早上6点之间切换为 dark mode,其余时间为light mode autoChangeMode: false 取消自动切换 |
1 | # 自动切换 dark mode和 light mode |
閲读模式
閲读模式下会去掉除文章外的内容,避免干扰閲读。
只会出现在文章页面,右下角会有閲读模式按钮。
配置butterfly.yml
1 | readmode: |
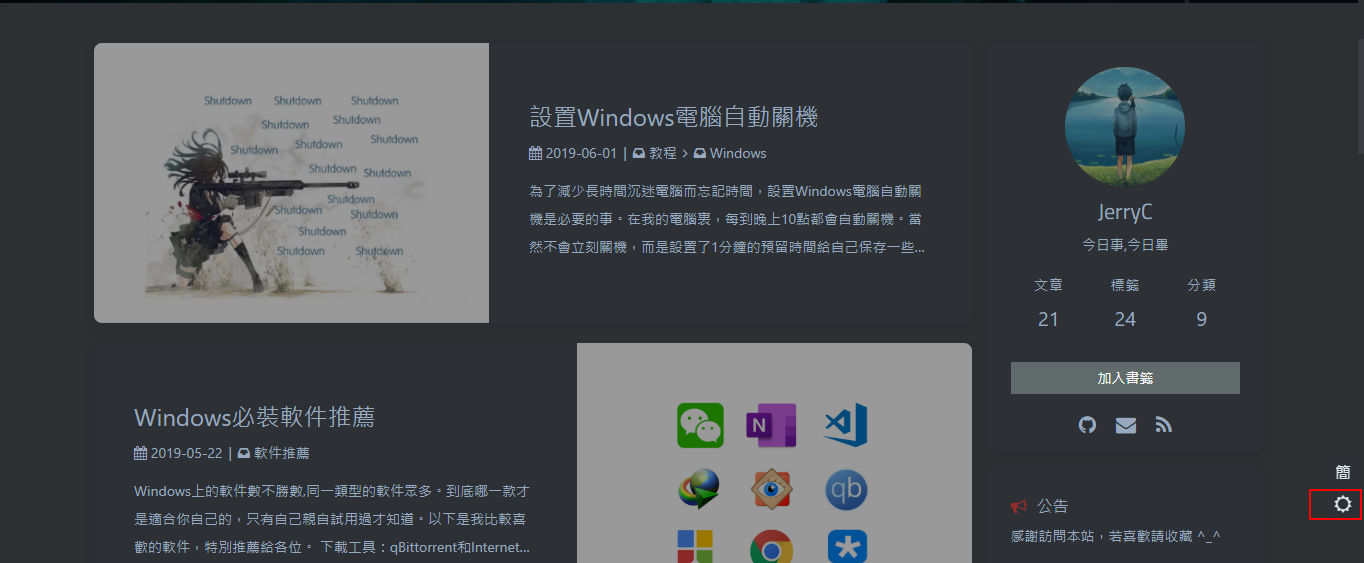
侧边栏设置
侧边排版
可自行决定哪个项目需要显示,可决定位置。
| 至少需要显示一个 |
1 | aside: |
| left |

| right |
访问人数 busuanzi (UV 和 PV)
访问 busuanzi 的官方网站查看更多的介绍。
配置butterfly.yml

运行时间
网页已运行时间
配置butterfly.yml
1 | runtimeshow: |

Note (Bootstrap Callout)
移植於next主題(注意,書寫不是markdown規範,而是hexo特有的功能,故在其它地方會顯示不出效果)
配置
配置butterfly.yml
1 | note: |
用法
1 | {% note [class] [no-icon] %} |
效果
演示效果
Gallery相册
| 2.0.0以上提供 |
写法:
1 | {% gallery %} |
例如
1 | {% gallery %} |

评论
Valine
遵循 Valine的指示去配置你的 LeanCloud 应用。以及查看相应的配置説明。
然后配置butterfly.yml:
1 | valine: |
分享
Sharejs
如果你不知道 sharejs,看看它的説明。
配置butterfly.yml
1 | sharejs: |

搜索系统
Algolia
你需要安装 hexo-algolia或 hexo-algoliasearch. 根据它们的説明文档去做相应的配置。
配置butterfly.yml
1 | local_search: |
分析統計
百度統計
- 登錄百度統計的官方網站
- 找到你百度統計的統計代碼

- 配置butterfly.yml
1 | baidu_analytics: 你的代碼 |
谷歌分析
- 登錄谷歌分析的官方網站
- 找到你的谷歌分析的跟蹤 ID

- 配置butterfly.yml
1 | google_analytics: 你的代碼 # 通常以`UA-`打頭 |
騰訊分析
- 登錄騰訊分析的官方網站
- 找到你的站點ID

- 配置butterfly.yml
1 | # Tencent_analytics ID |
美化/特效
自定义主题色
可以修改大部分UI颜色
配置butterfly.yml,比如:
| 颜色值必须被双引号包裹,就像"#000"而不是#000。否则将会在构建的时候报错! |
1 | theme_color: |
网站背景
默认显示白色,可设置图片或者顔色
配置butterfly.yml
1 | # 图片格式 background: url(http://xxxxxx.com/xxx.jpg) |
background:‘#49B202’
background: url(https://i.loli.net/2019/09/09/5oDRkWVKctx2b6A.png)
footer 背景
footer 的背景会与top_img的一致, 当设置false时,将与主题色一致。
配置butterfly.yml
1 | # footer是否显示图片背景(与top_img一致) |
true

打字效果
进入hexo根目录npm install activate-power-mode
配置butterfly.yml
1 | activate_power_mode: |
静止彩带
好看的彩带背景,可设置每次刷新更换彩带,或者每次点击更换彩带
配置butterfly.yml
1 | canvas_ribbon: |
相关配置可查看canvas_ribbon
动态彩带
好看的彩带背景,会飘动
配置butterfly.yml
1 | canvas_ribbon_piao: |
canvas-nest
配置butterfly.yml
1 | canvas_nest: |

鼠标点击效果
烟花
配置butterfly.yml
1 | fireworks: |
爱心
配置butterfly.yml
1 | # 点击出现爱心 |

文字
配置butterfly.yml
1 | # 点击出现文字,文字可自行修改 |
文章页美化
会改变ol、ul、h1-h5的样式
配置butterfly.yml
1 | post_beautify: |
title-prefix-icon填写的是fontawesome的icon的Unicode数。
| 未开啓美化 |

| 开啓美化 |
自定义字体
可自行设置字体的font-family
配置butterfly.yml
1 | font: |
网站副标题
| br/>适用于 版本号 >= V1.2.0 V2.0.0开始增加一些第三方api调用 |
可设置主页中显示的网站副标题或者喜欢的座右铭。
配置butterfly.yml
1 | # 主页subtitle |

主页top_img显示大小
| 适用于 版本号 >= V1.2.0 |
1 | # 主页设置 |
注意:index_top_img_height的值不能使用百分比。
2个都不填的话,会使用默认值
举例,当
1 | index_site_info_top: 40% |
效果
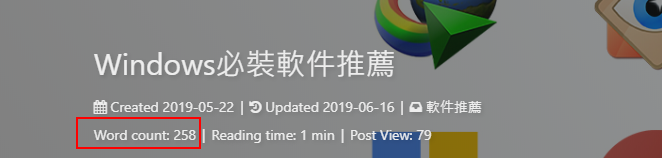
字数统计
要为Butterfly配上字数统计特性, 你需要如下几个步骤:
-
打开 hexo 工作目录
-
npm install hexo-wordcount --save or yarn add hexo-wordcount
-
配置butterfly.yml:
1 | wordcount: |
文章置顶
要为你一些文章置顶,你需要如下步骤:
- 打开 hexo 工作目录
- npm uninstall hexo-generator-index --save 然后 npm install hexo-generator-index-pin-top --save
- 你要在文章的front-matter区域里添加top: True属性来把这篇文章置顶。
- 你可以参考 hexo-generator-index-pin-top这个仓库来了解更多细节。
举个例子:
你的某篇文章开头如下:
1 | title: xxxx |
现在把top: True加进去:
1 | title: xxxx |
图片大图查看模式
默认为 fancybox,可以选择改爲 medium_zoom
配置butterfly.yml
1 | medium_zoom: |
| fancybox 打开模式 |

| medium_zoom 打开模式 |

Snackbar 弹窗
Snackbar弹窗,根据自己爱好开啓
配置butterfly.yml
1 | # Snackbar 弹窗 |
| 未开啓Snackbar |
| 开啓Snackbar |
作者: JerryC
鏈接: https://jerryc.me/posts/21cfbf15/
來源: JerryC
著作權歸作者所有。商業轉載請聯繫作者獲得授權,非商業轉載請註明出處。
 wechat
 alipay


